
Big ask please guys. Help me grow by subscribing completely free of charge to my YouTube channel, it allows me to keep creating content like this for you every week. Thanks 🙂
https://www.youtube.com/c/thecurrykid?sub_confirmation=1
If you’re looking to build a home Tandoor then this is the page for you. At the time of writing this project came to just under £50. (£49.09 to be precise although prices may change through the season and go up or down)
The heat for a tandoor was traditionally generated by a charcoal or wood fire, burning within the tandoor itself, thus exposing the food to live fire, radiant heat cooking, and hot-air, convection cooking, and smoking in the fat and food juices that drip on to the charcoal. Temperatures in a tandoor can approach 480 °C (900 °F), and it is common for tandoor ovens to remain lit for long periods to maintain the high cooking temperature.
DIY Tandoor Oven – Materials Required
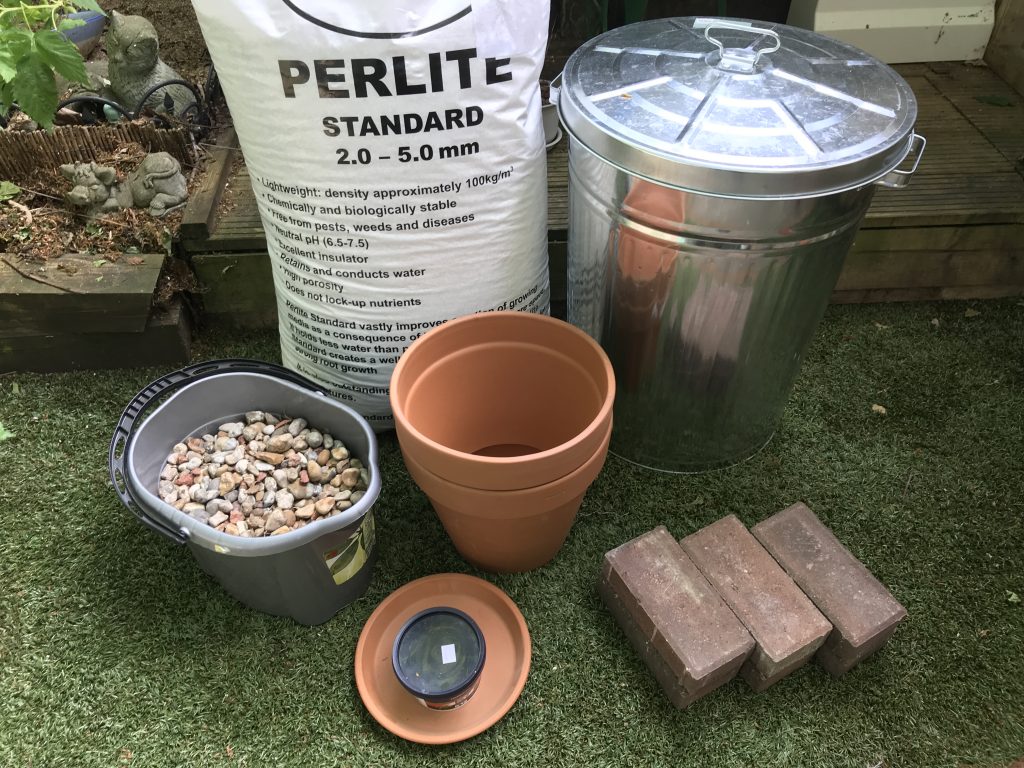
Links to suppliers of these materials are at the bottom of this page. I’ll keep it up to date but if you find cheaper suppliers please comment so I can update and others can easily find supplier.
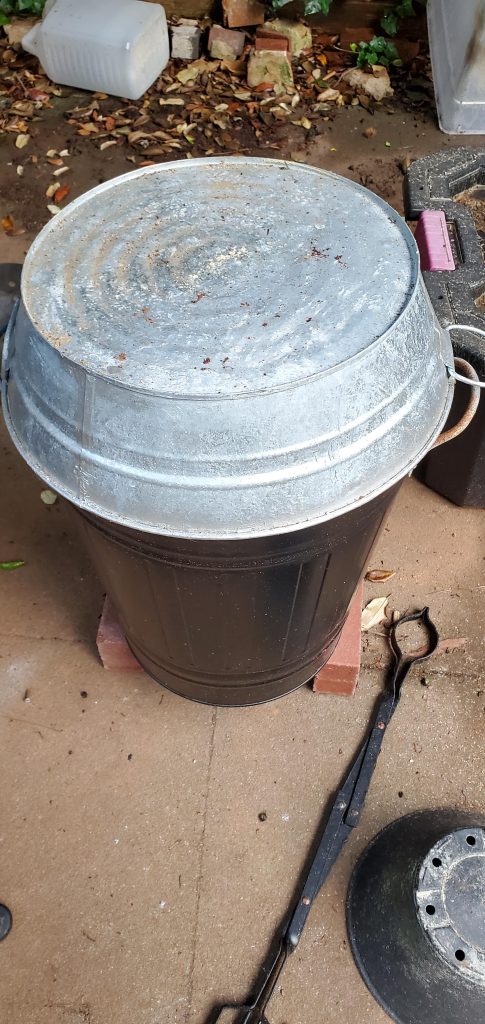
- 1 x 85 litre metal bin with closed lid (£18.75)
- 2 x Terracotta stone flower pots 30cm (£3.75 each)
- 1 x Terracotta stone flower pot dish stand (£2.85)
- 50 litres of Perlite or Vermiculite insulation (£16.99)
- 7 paving blocks or bricks (free from my nans garden)
- Fire cement (optional, very small pot) (£3.00 for 500g)
- Few handfuls of stones or pebbles
- Small oven tray to collect charcoal debris
- Long flat metal skewers (once you’ve built it)
Tools Required
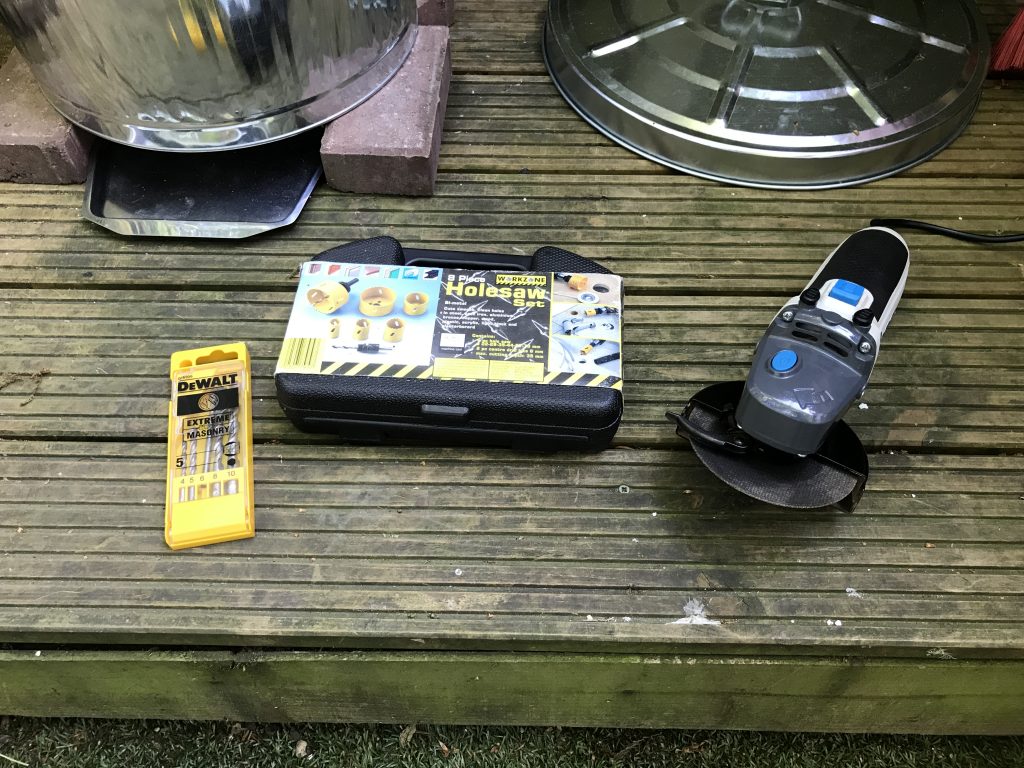
- Electric drill
- Masonry drill bits (I used DeWalt extreme masonry)
- Disc cutter or saw
- Hole cutter (optional)
How To Construct Your Home Tandoor Oven
You can complete your tandoor build in under 1 hour without rushing.
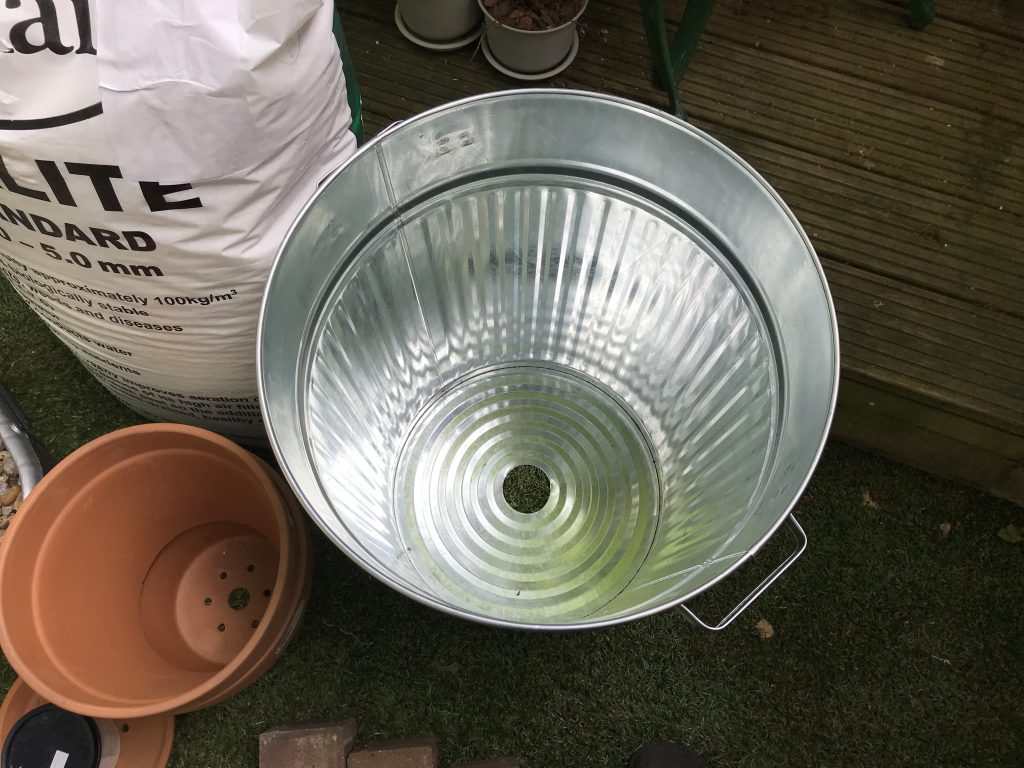
Drill the holes required for ventilation and debris removal
using a hole cutter, or by drilling lots of small holes in a circle cut out a 6-10 cm hole in the centre of them metal bin. This is where the ventilation will rise and debris will drop into your collection pot.
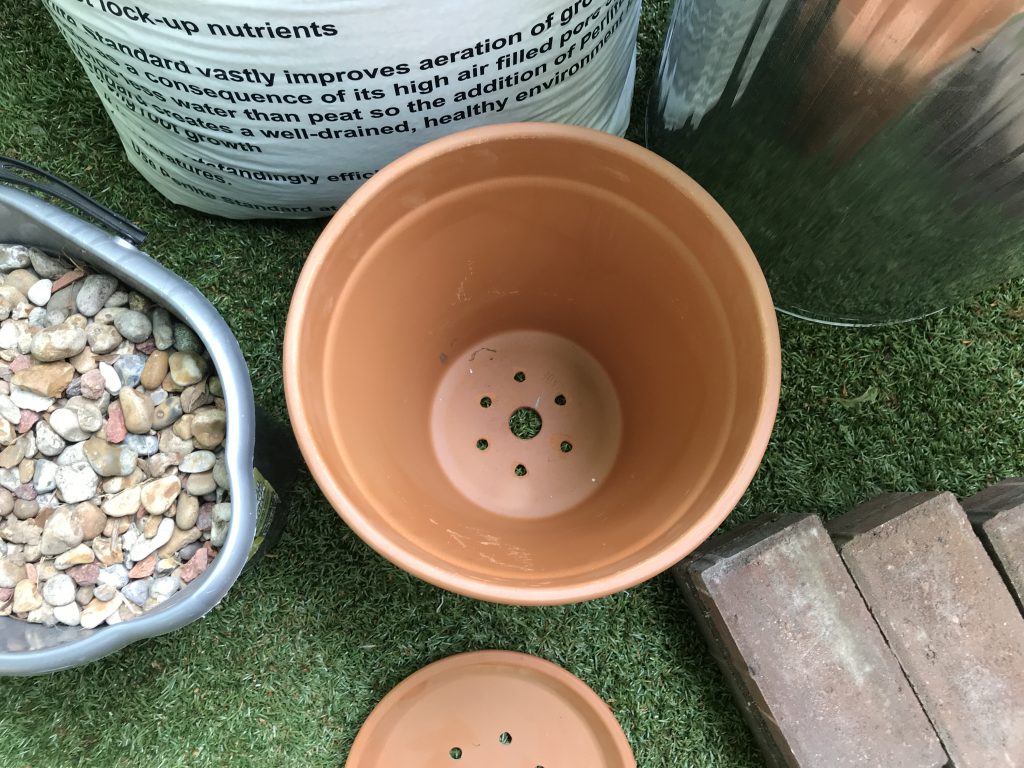
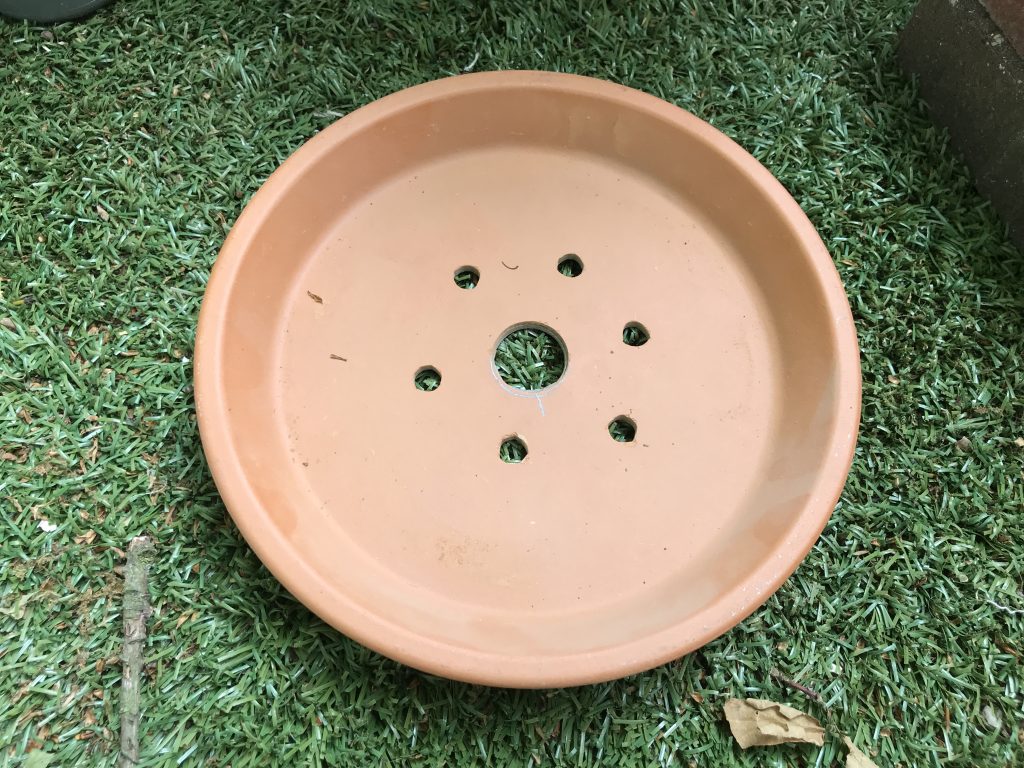
Drill matching ventilation holes in 1 of your terracotta pots and the saucer
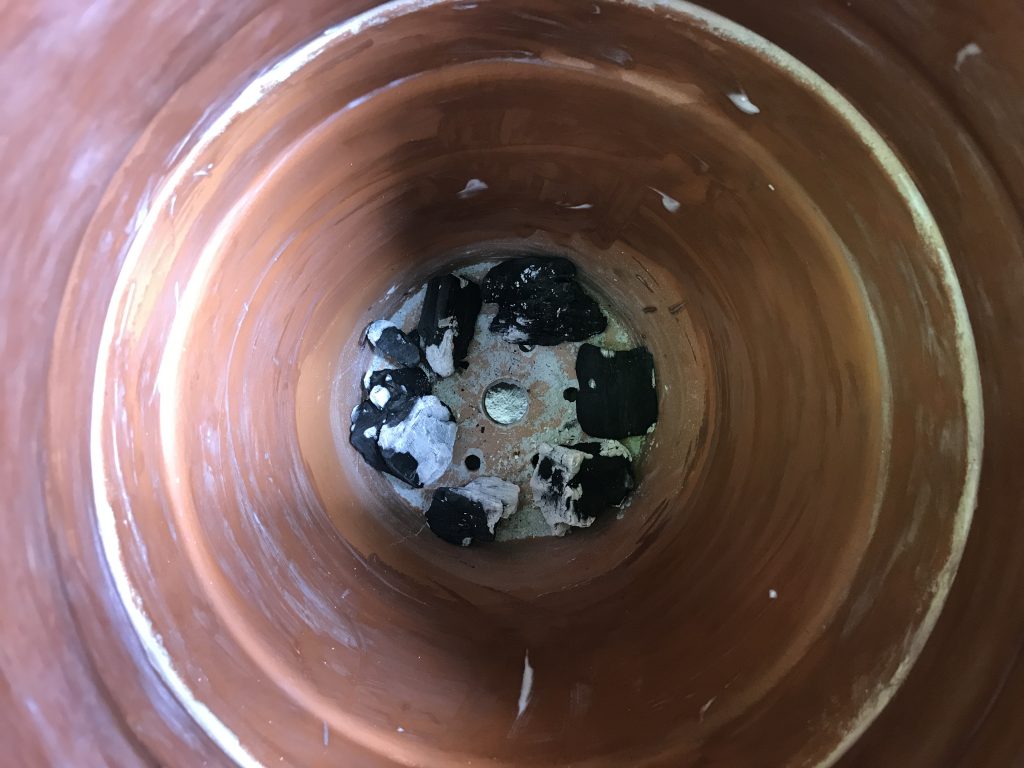
Place the plant pot on a suitable surface and drill 6 or more ventilation holes around the centre. I used a 4mm bit followed by 8mm then 10mm to ensure the pot didn’t crack.
Now place the drilled plant pot centre onto the saucer and using a pencil mark the position of the holes. Remove the pot and drill matching holes in the saucer. For the centre hole I used a hole cutter but again you can drill a number of small holes in a circle then gently tap out.
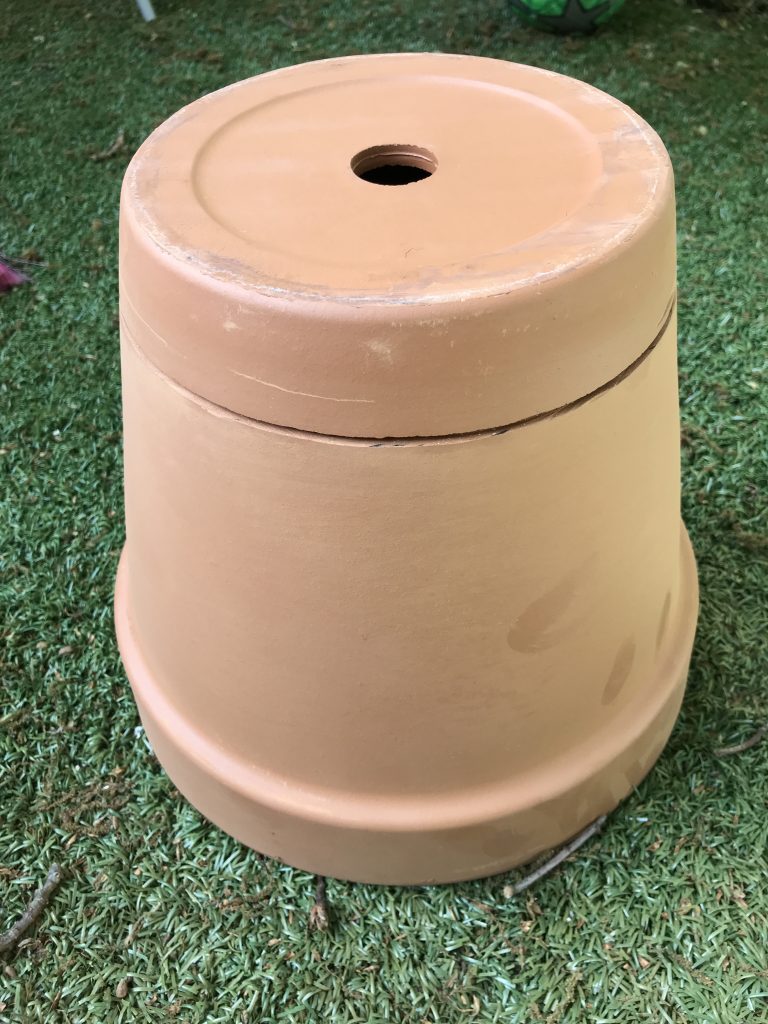
Cut the top off of your other pot to make the top of the tandoor and a lid
Mark a line around the bottom of your other pot around 4cm from the base. Using either a disc cutter or saw carefully cut around the edge until they separate. Don’t try to cut straight through in 1 go but go around the edge making a deeper cut each time. My dad cut this using a disc cutter for me and recommends you wear eye protection and some sort of face mask and ear defenders as he said it was extremely loud and dusty. The lower down the pot you cut the bigger/smaller the opening of the tandoor will be.
Time to construct your home tandoor so find a suitable place for it to live
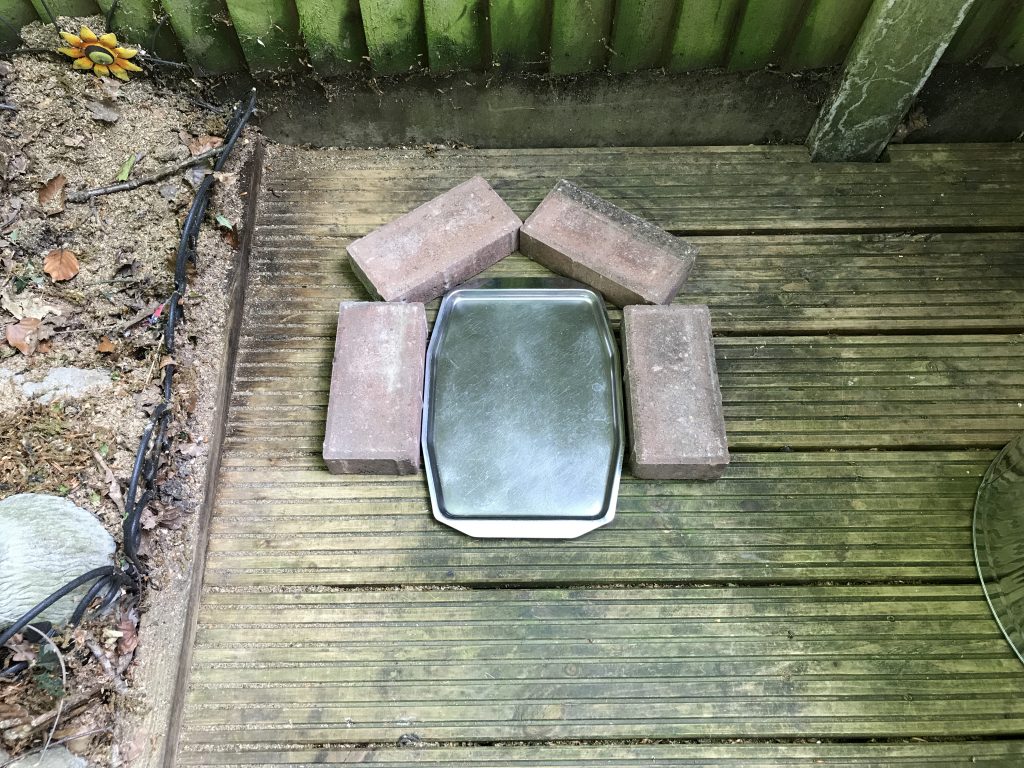
Start by placing your debris tray on the floor where you want your home tandoor then place 4 blocks or bricks around the sides and back to steady the bin.
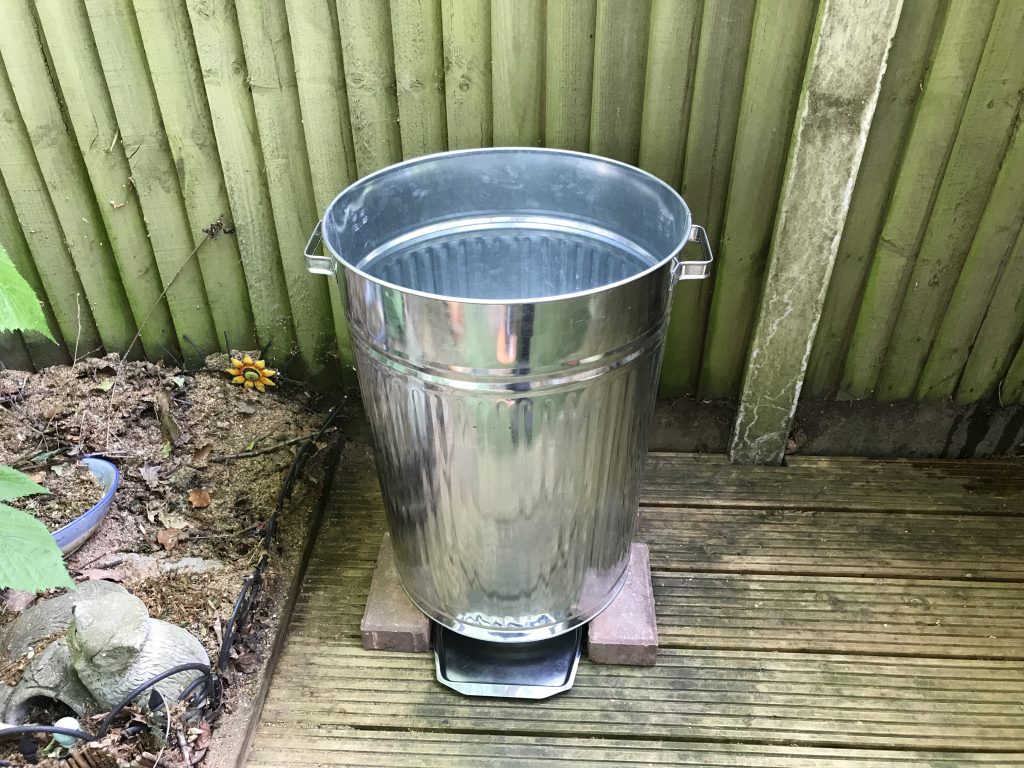
Place your bin on top of the blocks and make sure you have enough room to remove the debris collection tray and that the bin is secure and cannot fall forward.
Place 3 of the blocks or bricks in a triangle pattern in the base of the bin. Make sure they are touching each other and do not cover the ventilation / debris hole.
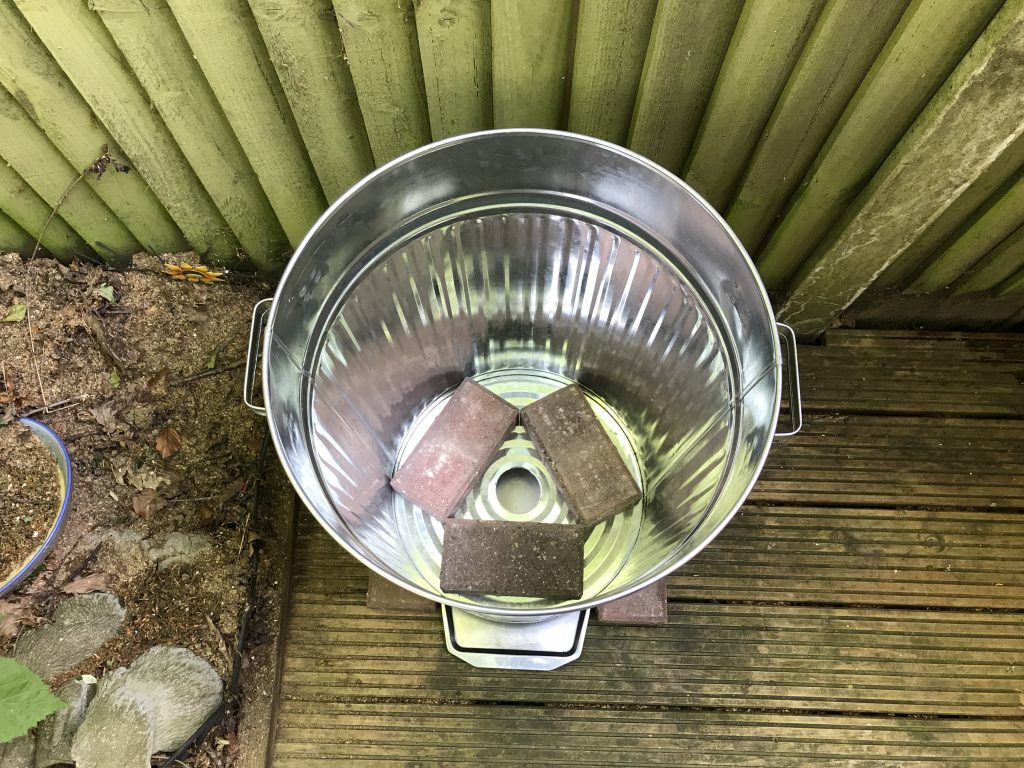
Add a handful of stones or pebbles around the back of all the blocks to secure them. Make sure they come to the top of the blocks but are as level as possible
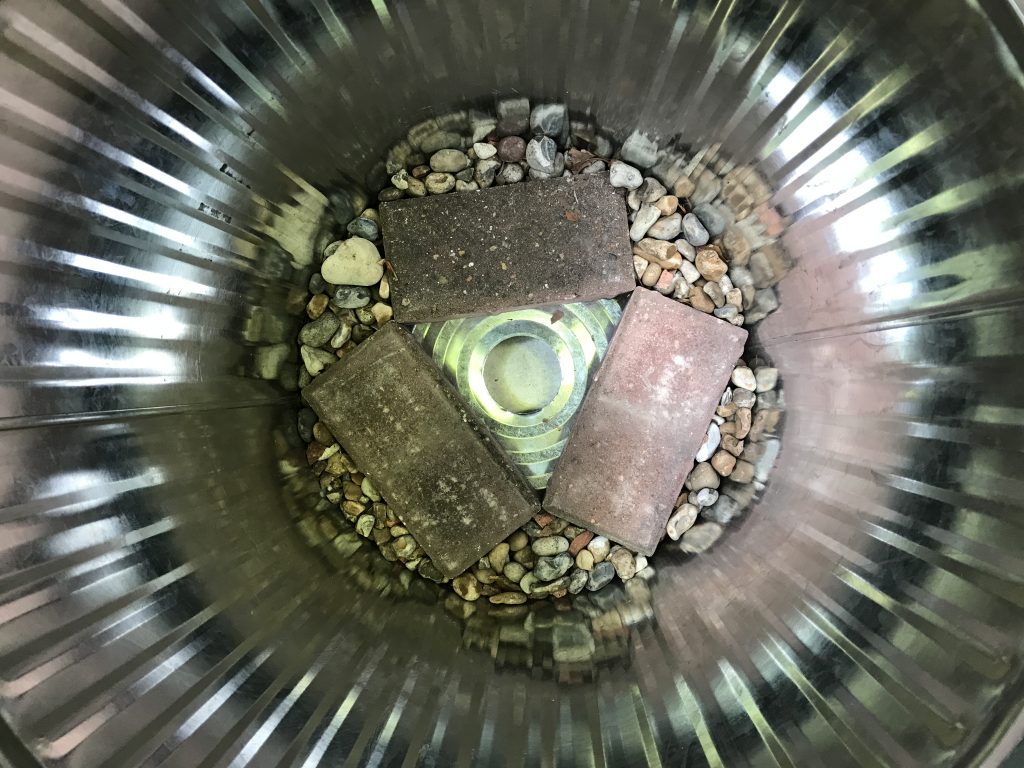
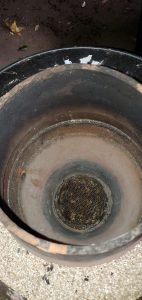
Place the saucer in the centre of the blocks ensuring the centre hole is over the cutout in the bin itself
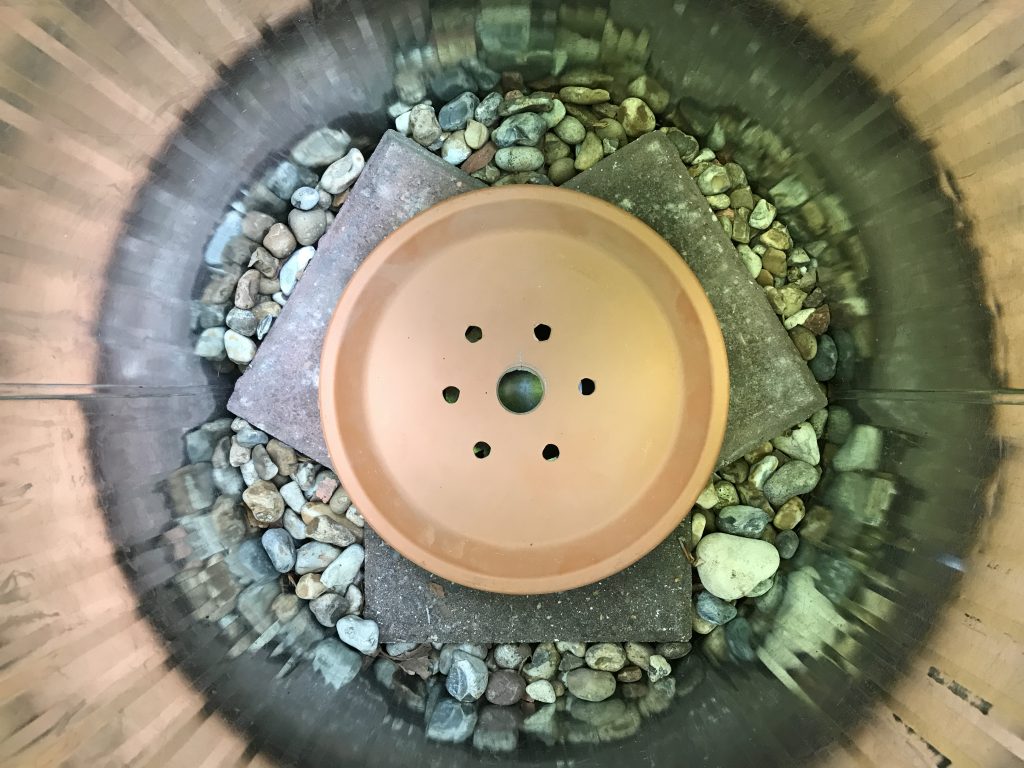
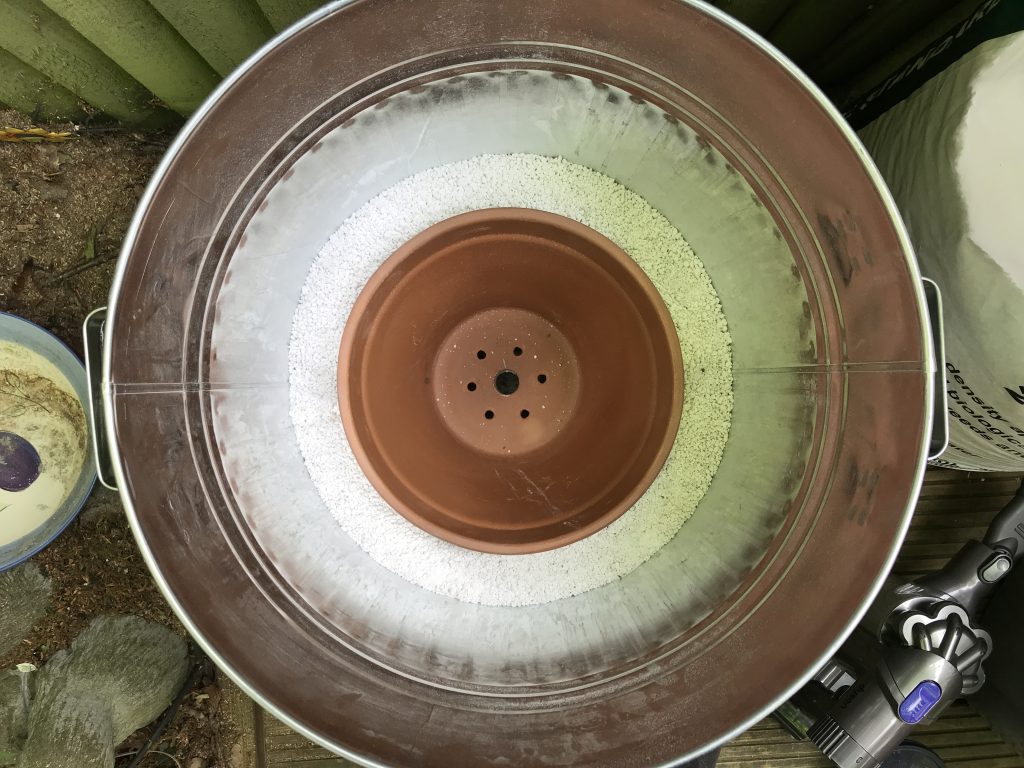
Place the first flowerpot with the holes drilled in it on top of the saucer and align the holes
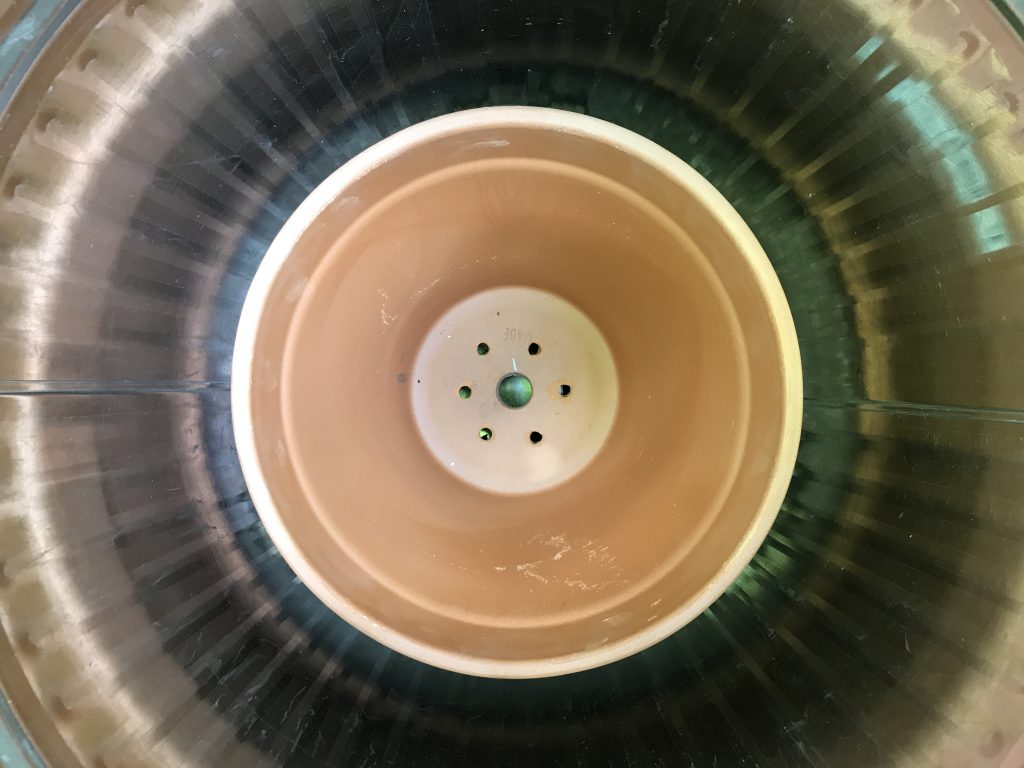
Fill the sides with the Perlite or Vermiculite insulation to about 5 cm below the top of the pot. This just ensures it’s held steady so far.
If you are using fire / oven cement add a small bead around the top of the pot. This simply helps to keep things together and ensure the heat doesn’t escape through any big gaps in the pots
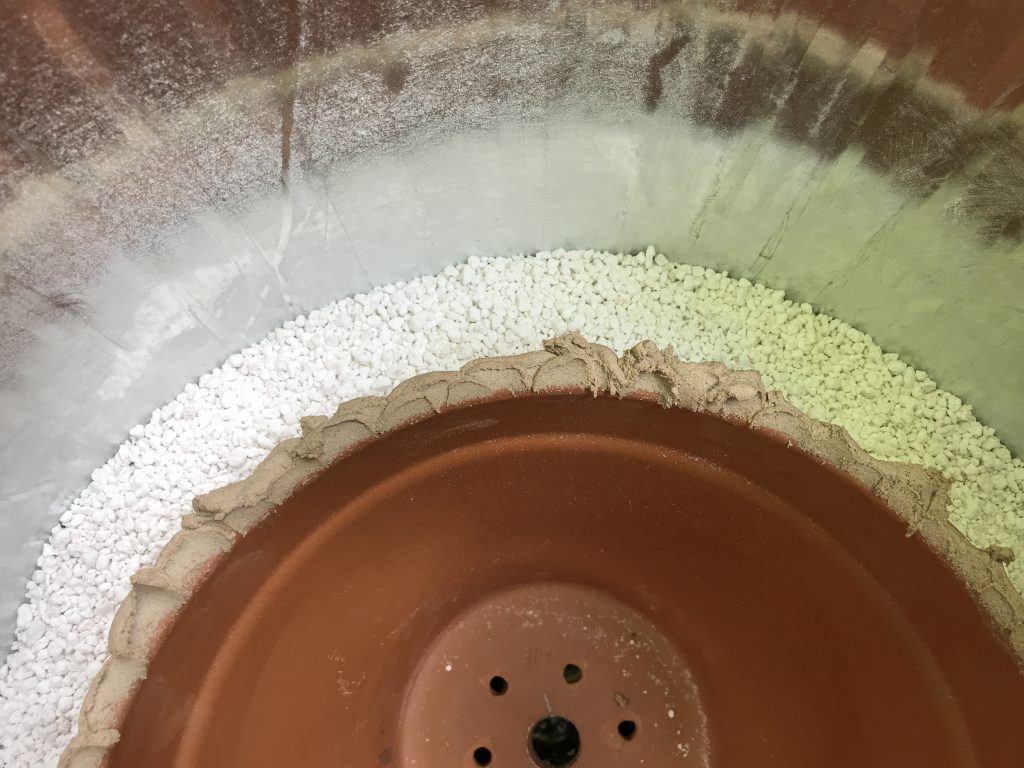
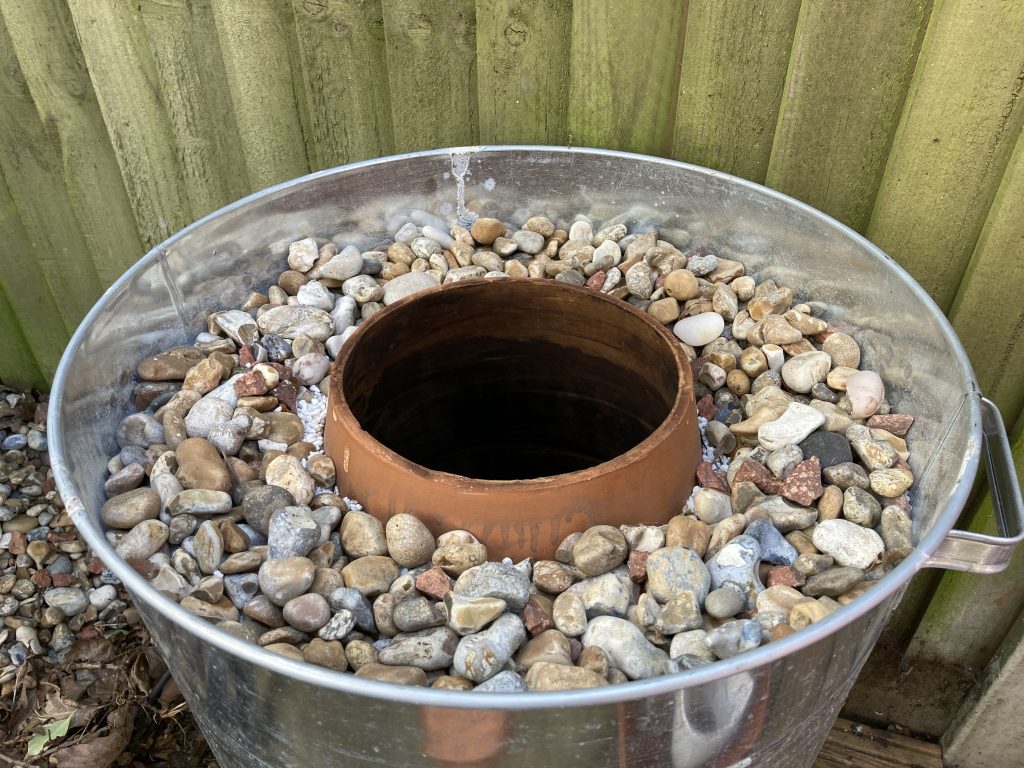
Place your last flower pot upside down (with the end you have cut facing up) and press carefully into the oven cement, make sure both pots are perfectly aligned. Fill the outside with more Perlite or Vermiculite insulation and tap the sides gently to settle into all the cracks. If you have used oven cement smooth off any excess inside for a neat finish.

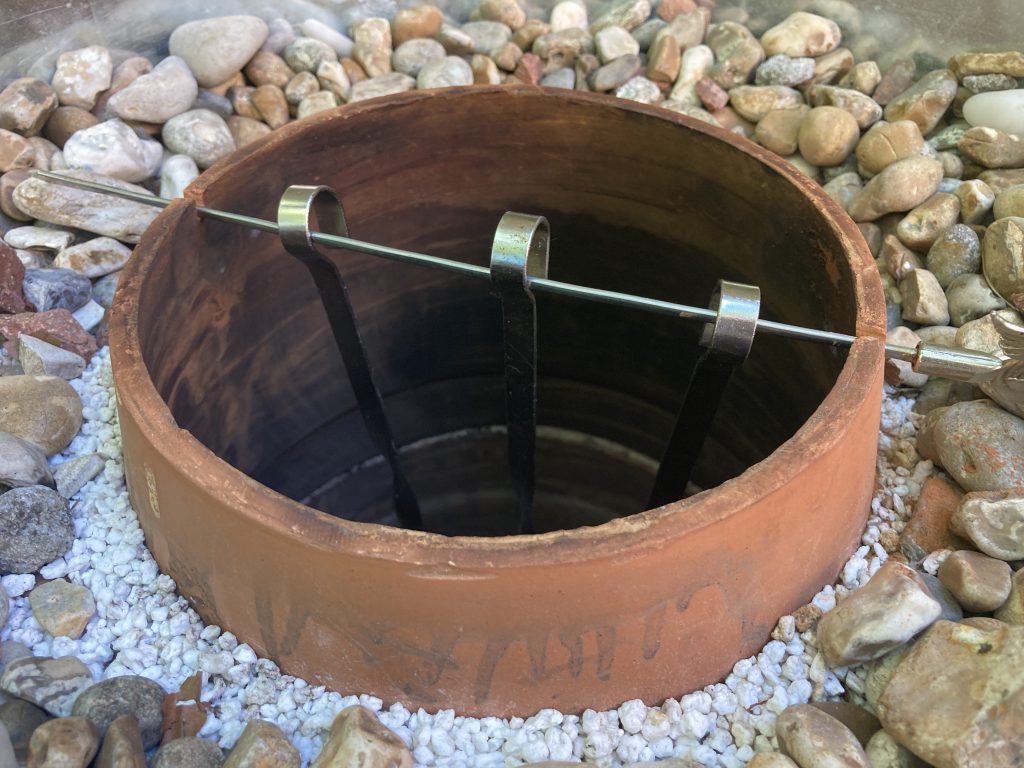
People making my tandoor are also cutting small notches out of the open top part to allow you to place a bar across and hand the skewers from. Great idea 🙂
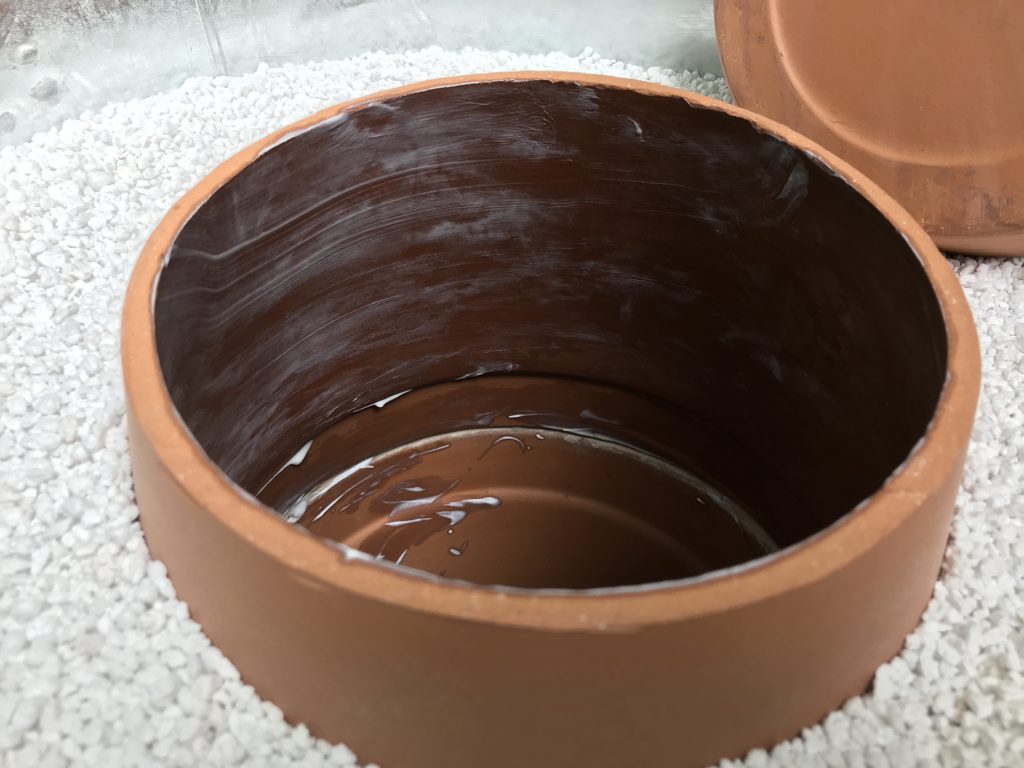
Season the inside of the tandoor by mixing some oil (any kind will do) and coating the top half inside, you can also add a little yoghurt if you have some. This will dry as you do your first warm up and seal the top to allow for things like your naans to be removed easier. You could also use a wash of salt and water. After priming heat your oven for around 6-8 hours on full and everything will be well sealed. Nans will not fall off into the coals yet will not stick so much you cannot remove them.
That’s it. You’re good to go so now it’s time to prime your oven ready for use.
The first time a tandoor is used, the temperature must be gradually increased to condition the interior of the oven
This step is crucial in ensuring the longevity of the tandoor. Conditioning can be done by starting a very small fire and slowly adding fuel to gradually increase the amount of heat inside the tandoor. Hairline cracks might form during conditioning; this is normal and will not interfere with the performance of the tandoor oven. When the oven cools off, the hairline cracks will barely be noticeable. They are essential in allowing the clay body of the tandoor to breathe (thermal expansion and contraction). The slower the temperature inside the tandoor is increased during its first use, the fewer hairline cracks will develop
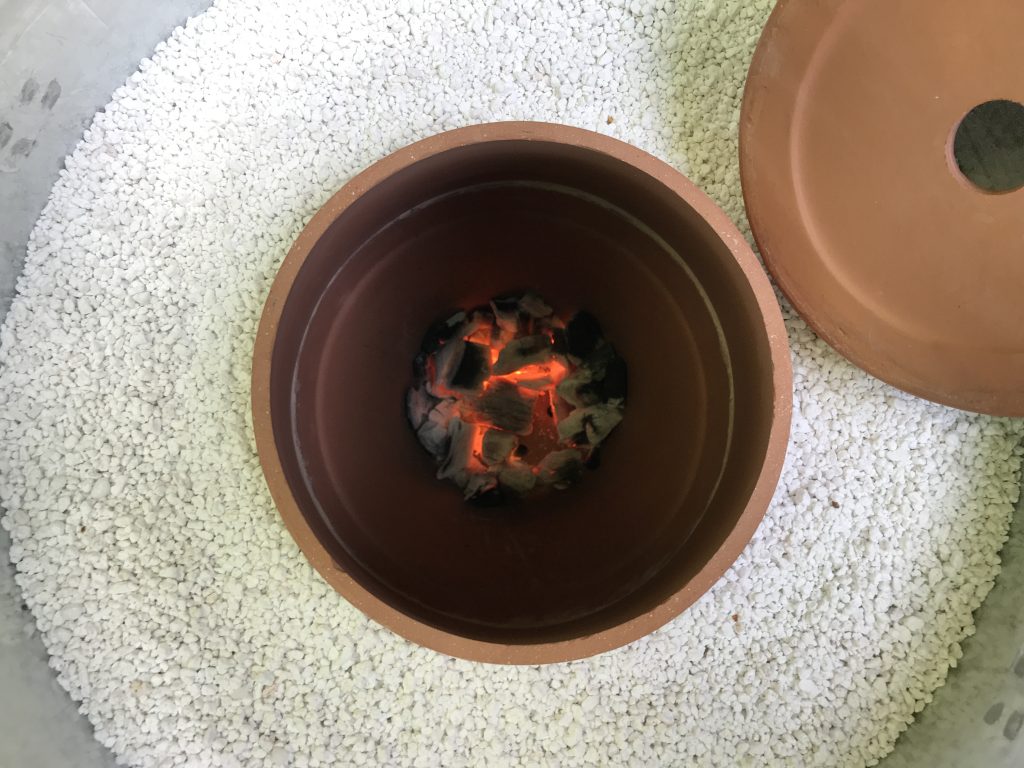
This will be first for the first warmup, about 6 lumps of lump wood.
After you’ve done your initial heat up and allowed it to cool down you’re good to go. Load up with your coals and enjoy. Sit back, enjoy and become the envy of all your friends.
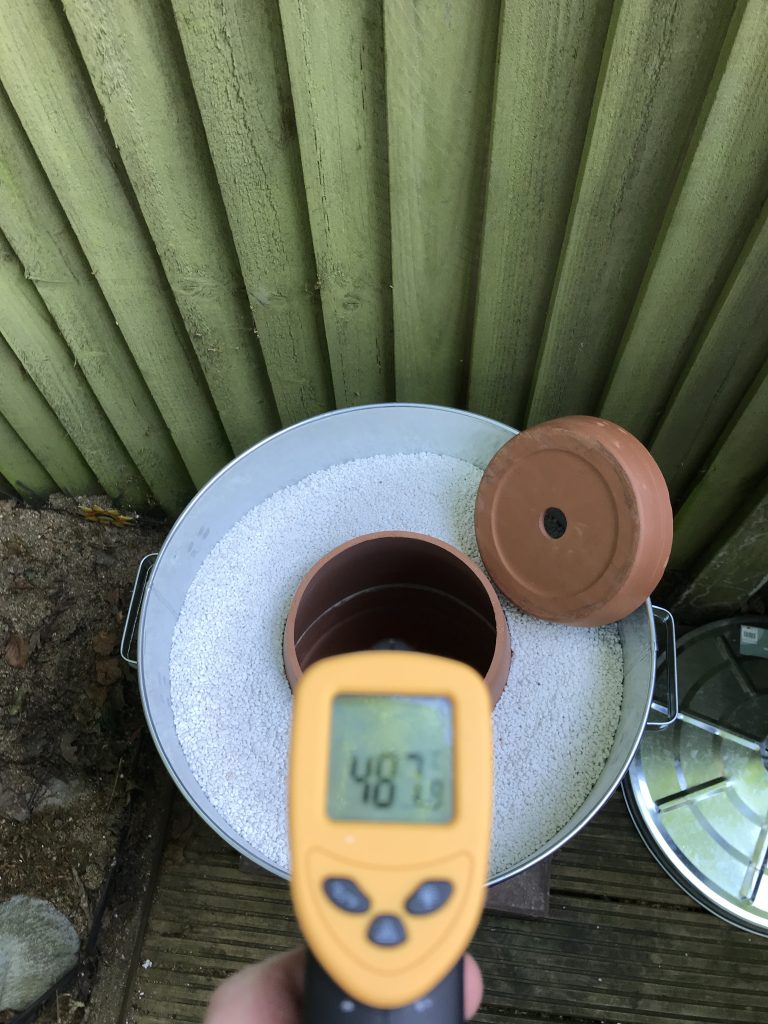
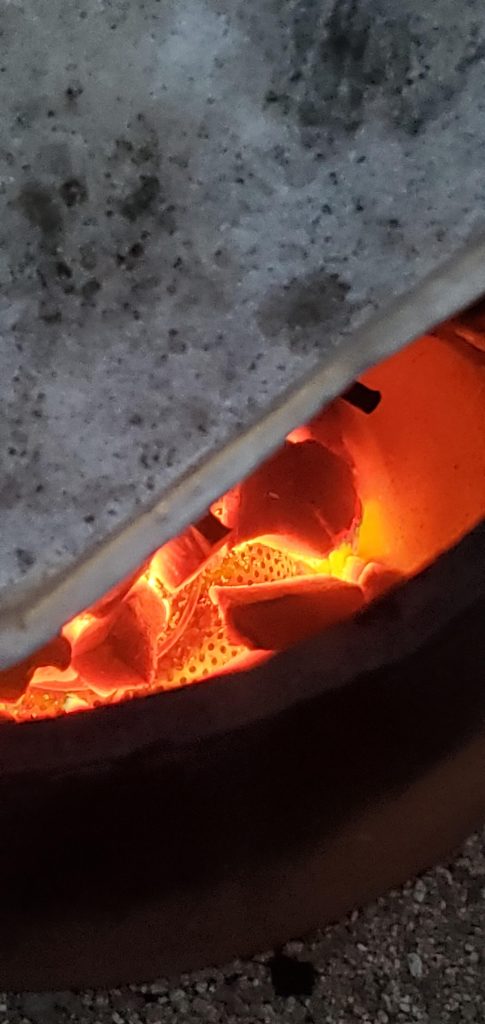
Take care though as these throw out some real heat. My laser thermometer cut out at 500 Celsius saying MAX.
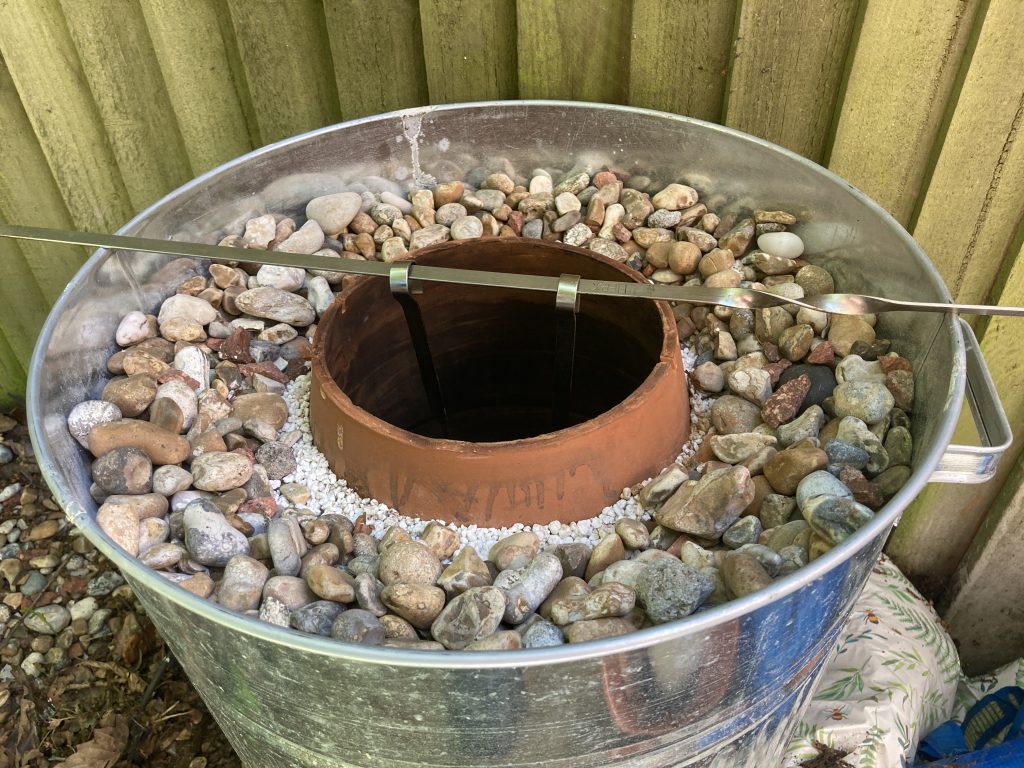
Add a few stones or some broken up paving slab on top to stop the insulation from flying around. When you cook remember to pull these away from the top of the tandoor by a couple of centimetres as they could explode if they get too hot.
Using Your Tandoor
I Use these skewers form Amazon as they are long enough to stick out the top a good way and are flat so meat doesn’t rotate: 56 cm metal flat skewers: https://amzn.to/3cXbC1d and these from eBay for Seekh kebabs (3mm x 20mm x 580mm) https://www.ebay.co.uk/itm/274106099186
It’s important to take care around your tandoor when in use. I have a laser thermometer and it just maxed out after reading 550 degrees Celsius from the centre of the tandoor. Whilst taking photos for this build I dropped a metal skewer into the tandoor, went to pick it up no longer than a couple of seconds later and instantly burnt my hand so take care, these heat everything extremely fast.
Priming your oven for first use
The first time a tandoor is used, the temperature must be gradually increased to condition the interior of the oven. This step is crucial in ensuring the longevity of the tandoor. Conditioning can be done by starting a very small fire and slowly adding fuel to gradually increase the amount of heat inside the tandoor. Hairline cracks might form during conditioning; this is normal and will not interfere with the performance of the tandoor oven. When the oven cools off, the hairline cracks will barely be noticeable. They are essential in allowing the clay body of the tandoor to breathe (thermal expansion and contraction). The slower the temperature inside the tandoor is increased during its first use, the fewer hairline cracks will develop
Regular use
Before use always remove the old charcoal debris from the bottom of the tandoor and ensure the ventilation holes are clear. You can add your lumpwood charcoal directly into the base, light with a natural firelighter such as wood wool and allow to grey over before cooking. I find it easier to use a “BBQ starter chimney” to stack up the charcoal first and then empty into the tandoor once glowing hot.
You can place the end of your skewers directly onto the coals if required, or use the lip inside the first flowerpot 1/2 way up the tandoor. I would recommend at least 50cm flat skewers and that you wear a glove at all times when using.
Where to buy (UK)
- Garden bin with lid: https://www.homebase.co.uk/search/products?q=garden%20bin%20with%20lid
- Plant pots: https://www.homebase.co.uk/search/products?q=flower%20pot%2030cm
- Plant pot stand: https://www.homebase.co.uk/search/products?q=Terracotta%20Plant%20Pot%20Saucer%2023cm
- Perlite or Vermiculite: https://www.ebay.co.uk/itm/Hydroponics-Plant-t-Perlite-100L-Litre-Bag-Propagation-Cuttings-Potting-Plant-It/164098044444
- Fire cement: https://www.homebase.co.uk/search/products?q=fire%20cement
- 56 cm metal flat skewers: https://amzn.to/3cXbC1d
- Flat wide skewers for Seekh kebabs 3mm x 20mm x 580 mm https://www.ebay.co.uk/itm/274106099186
User Pics and Tips
Big thanks to aureanator (Reddit) who tweaked the build to give the coals more airflow by using a upturned metal colander on the bottom and a metal tub used for a weatherproofing lid allowing him to use bigger pots
Questions and tips from supporters.
How much does the completed tandoor weigh?
27kg
When heated to high temperatures can coatings on those bins burn and begin to produce poisonous zinc gas?
yes if heated well over 200+ Celsius but the perlite or vermiculite insulation ensures that even when the tandoor is as high as 550 Celsius the outer bin temperature reaches no more than 25 Celsius
How much charcoal do I need?
Add just a handful of coals into the tandoor, it’s all you need. don’t go adding whole bag.
How do I stopping the pot walls cracking:
Ensure you take time to slowly prime the oven as detailed above. Your first burn should only need 1-2 coals, this will still heat the tandoor to around 200 Celsius. Increase this for each cook to no more than a handful each time.
Are the stones on the top dangerous?
They are purely there in mine to stop the insulation flying off. You can use broken paving or pour some cement over the top to form a hard layer. If you go with the stones brush them back a few centimetres from the top opening of the tandoor when you cook so they do not get hot enough to become dangerous
—
Many thanks to the following great people for taking time to share their wisdom, if you have any more tips send them to joshua@thecurrykid.co.uk and I’ll add them and credit you:
Steve Cobb (cobbshomecooking), thespiceraja, Birdman_Harvey, Surtock, Chris Gardiner, aureanator
Based on ideas from a design by BiBs Kitchen