

Ingredients
-
330ml / 330g Water
-
200ml / 204g Milkskimmed or whole
-
8 tablespoons / 100g Sugar
-
2 teaspoons Onion Seeds (Kalonji/Nigella)
-
2 level teaspoons / 9g Baking Powder
-
50g (medium) Egg (Whisked)approximately
-
1000g Self Raising Flourany brand is fine
Directions

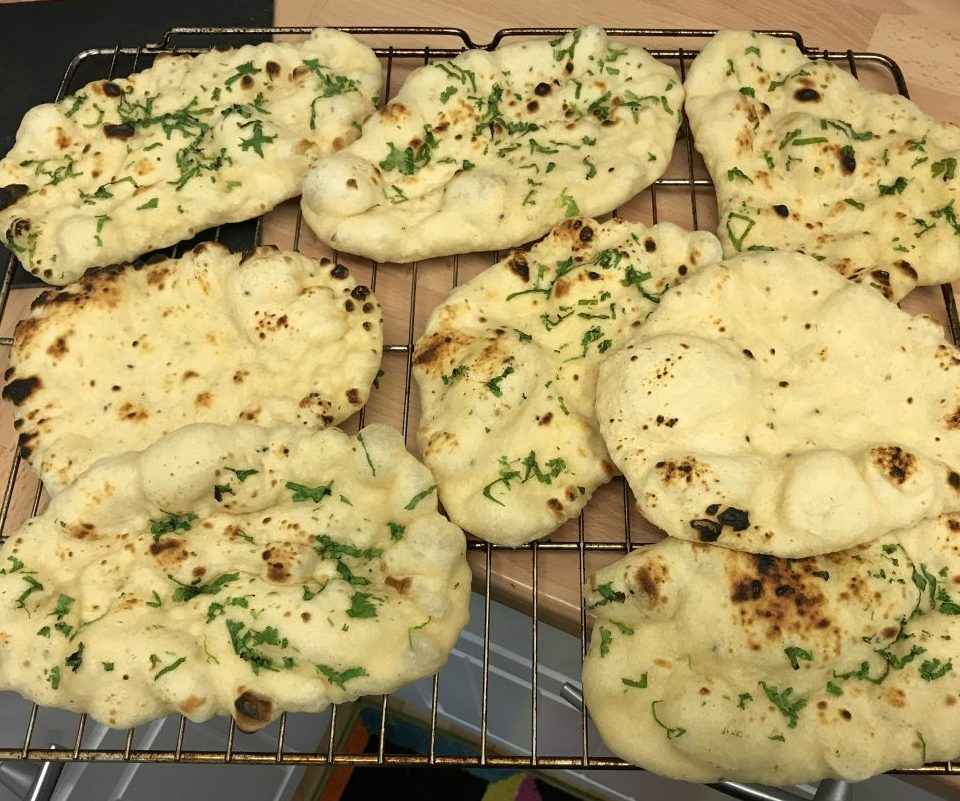
Discover the joy of indulging in homemade goodness with my Yeast-Free Indian Naan Bread recipe.
Elevate your dining experience with these soft, flavourful naans that add the perfect touch to any meal and master the art of creating authentic naan bread from scratch, no yeast required.
Explore the soft fluffy textures that make my homemade naan a standout choice. Elevate your culinary skills and savour the satisfaction of serving up irresistibly delicious naan bread every time. Don’t waste another minute, get cooking and experience the magic of my yeast-free Indian naan bread today!
The dough for this recipe can be made in advance and stored, covered in a refrigerator for up to 3 days before cooking. It makes 10 large naans but you can increase/decrease proportionally to make as many or few as you like
As this dough needs to rest a while once mixed I suggest making this in the morning, ready for cooking in the evening?
Original recipe by Chris Johnson (also known as ‘H4ppyChris’)
Steps
|
1
Done
|
Place the water, milk, sugar, onion seeds, baking powder and egg into a bowl and combine gently with a fork. stir frequently until the sugar dissolves properly |
|
2
Done
|
add the liquid mixture to the flour and stir gently to combine with a fork (it's easier than your hand as it tends not to stick as much) until it lumps together. You can also use a bread mixer or food processor to bring all the ingredients together. There is no need to knead, you just want it all combined |
|
3
Done
|
place in a lightly greased bowl, cover, and leave on your kitchen side for around 3-4 hours to rise slightly |
|
4
Done
|
oil or flour your hands lightly (it stops the dough sticking), punch down the dough to release the built up gas. You can store in the refrigerator (covered) now if you need for 2-3 days |
|
5
Done
|
remove from the bowl and divide into 10 roughly equal portions, moulding the dough into ball shapes. Flour generously then place them on a plate to relax for a further couple of hours, the longer you leave them the more relaxed the dough will get |
|
6
Done
|
At this stage, the dough balls can be stored in the refrigerator for up to 3 days, frozen (which is what I do in little plastic bags or clingfilm) or used immediately but however you use them make sure they are at room temperature before you cook them, it makes all the difference |
|
7
Done
|
To cook, start heating the pan or tawa on full heat. Iron tawa's are not non stick and are perfect for this recipe allowing a naan to be completely cooked in about 60 seconds (If you are using a frying pan or a non-stick tawa you will need to grill the top of the naan so also heat your grill to its highest setting (250+) preferred. Flour the dough ball slightly and roll/stretch into the shape required. Dust off the excess flour, brush the top side with a little oil, add any flavouring you require such as sliced / crushed garlic and coriander and press down well |
|
8
Done
|
Lift the naan and flip over your hand. Dab a bit of water on the other side (this will help it stick to the tawa and create steam to rise then flip the wet side onto the pan or tawa and cook for about 10-20 seconds on the bottom until it starts to bubble -- using a tawa -- I have this one: https://amzn.to/35lzLLj - using a pan -- |
|
9
Done
|
brush with a little butter, serve and enjoy |